Sneak peek of Chocolates for everyone!!

So I have a massive family. Like huge, my mum is the youngest of 10 and they all have kids and lots of those cousins have had kids now so our family get togethers are always big! Every year we organise a Christmas party and I try to make my presents because I’m too poor to buy everyone something… 

It’s usually food because that’s easy to do in bulk, one year it was biscuits, another it was chilli jam. This year it’s chocolates!

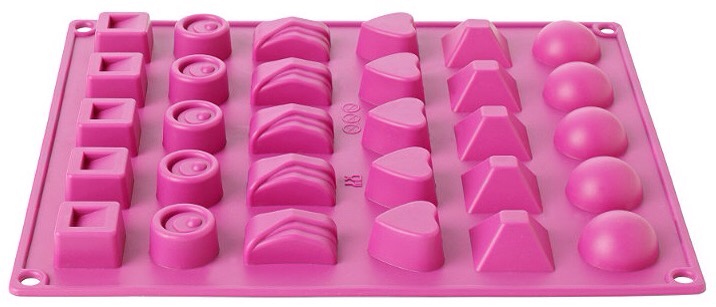
I’ve got myself a chocolate box silicone mould from Lakeland:


I’ve never done any proper chocolate making (just plenty of chocolate eating!) I decided to get the Thermospatula as well so I can attempt to temper the chocolate and hopefully make them look really good:

  
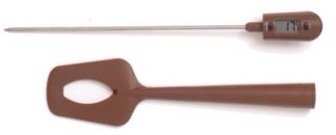
I’m kinda excited about using this just because I love a good gadget!

I’ve already started making some boxes using this tutorial and some Christmas scrapbook paper that I bought from eBay:

  
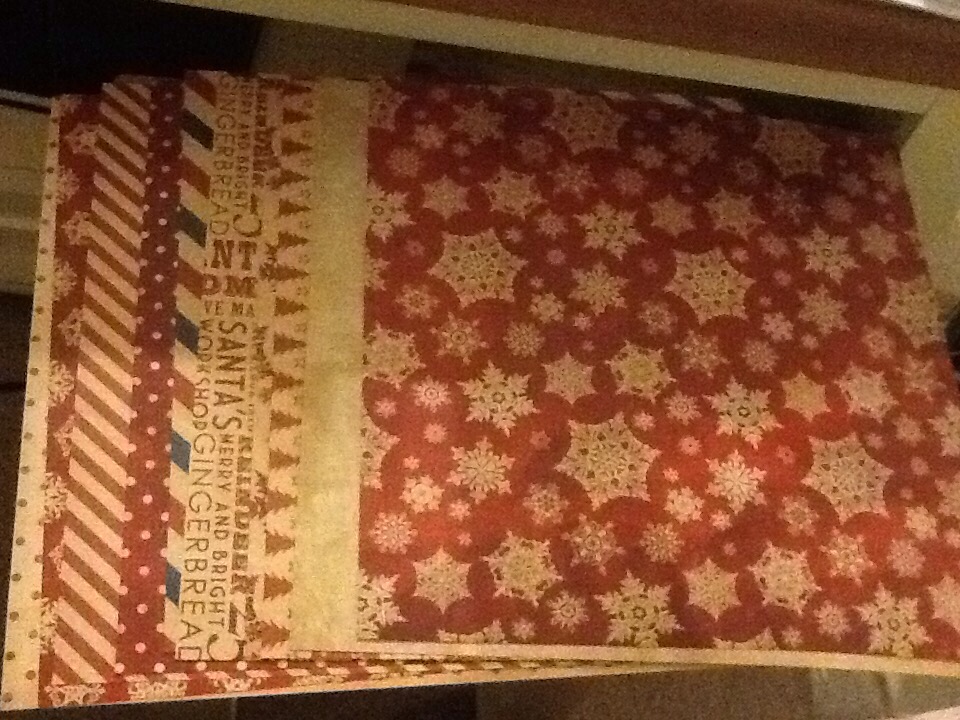
(Sorry about the fuzzy photo, working with an iPad is hard!)

  
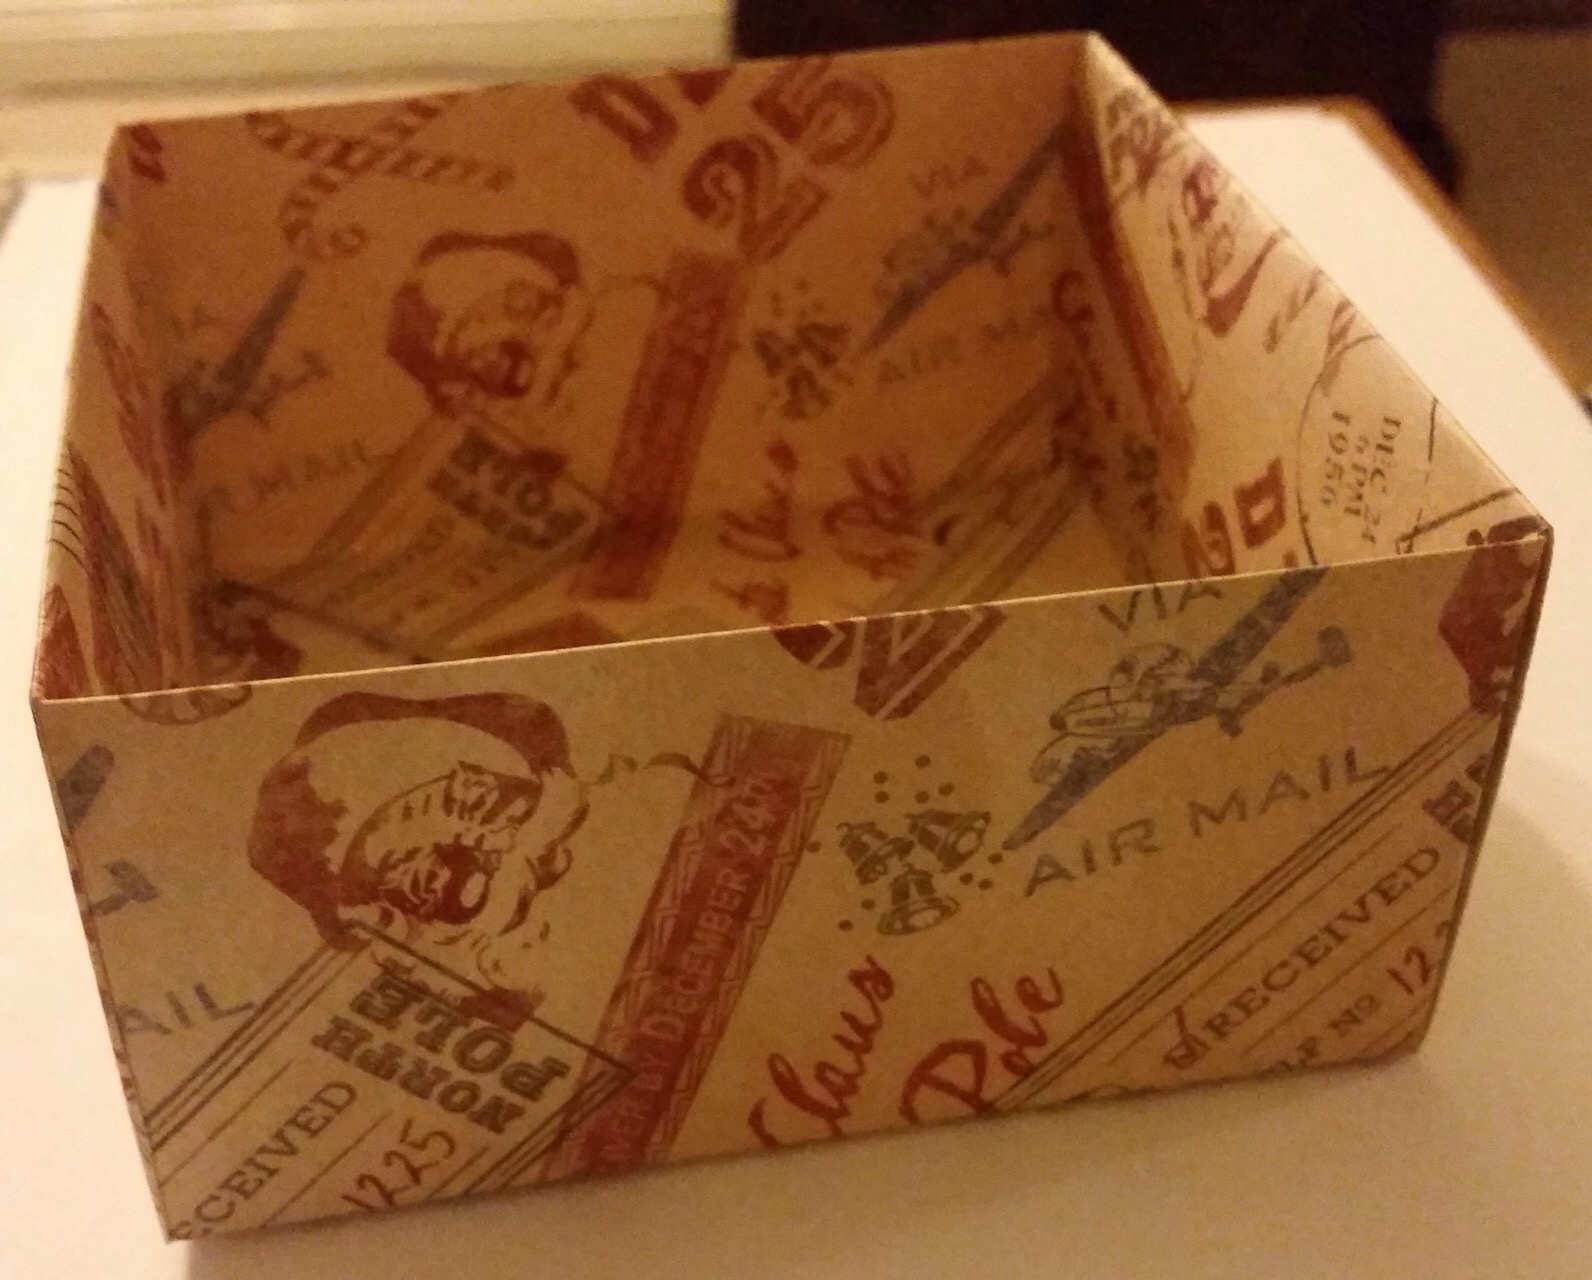
This was my second attempt after I failed to follow the instructions the first time around…

I’m hoping to make the chocolates this week and post a full tutorial next weekend. Keep an eye out! 

Advertisement

The Innocent Big Knit 2015

I’ve finally managed to knit something!! I’ve knitted three hats for the Innocent Big Knit event which aims to raise awareness and money for the charity Age UK

IMG-20151105-WA0005

These were made using Innocent’s basic hat pattern

I’m hoping to make at least another three before the deadline in December. These hats are then put on Innocent Smoothie bottles in shops and a donation is made to Age UK for every bottle sold with a little hat on them. Follow Innocent Smoothies on Facebook to see some of the amazing and creative other hats they’ve received!

Foolproof American Pancakes in the UK

I’m mega excited because one of my friends is moving to LA next year so this weekend I booked flights to go and visit her for two whole weeks at the end of Feb!!!

One of the things I love about America is the pancakes, they’re light and fluffy, filling and have so many options for accompaniments! So I decided to make it my mission to make perfect American style pancakes here in the UK before I go to LA so that I can boss it while I’m there.

These are the pancakes I had to live up to:

NYPancakes

These are the ones I had at The Tick Tock diner in New York earlier this year and they were absolutely DIVINE.

So I headed off to Pinterest to find myself a recipe. I chose this one from Candace Davenport at Somewhat Simple.

I halved the amounts since I was only making them for two people.

Ingredients:

1 1/3 cups sifted plain flour
3 tsp baking powder
1/2 cup of sugar
2 eggs, beaten
1 cup of milk
2 tbs. olive oil

This made 8 pancakes – 4 per person which was more than enough.

Ingrediants

Utensils:

  • Large mixing bowl
  • Smaller bowl
  • Whisk
  • Frying pan
  • Large flat spatula (this is a good one)

Directions:

  1. Sift the flour, baking powder and sugar into a large bowl and use a whisk to mix together
  2. dryingrediants

  3. In another bowl, crack the eggs and beat together with a fork, add the milk and mix
  4. wetingrediants

    Around this time, someone set off a firework nearby so Apple came to make sure I was ok:
    AppleSpooked

  5. Add the olive oil to the egg & milk mixture and mix well
  6. oil

  7. Add the wet ingredients to the dry and mix until just combined (don’t overdo it, lumps are ok!)
  8. mixwetanddry

  9. Get your frying pan on to warm up on a medium heat on the smallest ring of the hob
  10. Hobandpan

  11. Add a 1/3 cup of batter to the hot pan
  12. batter

  13. Check your pan position, you want to ensure that wherever you’ve dropped the batter, the heat from the burner is centred directly below the pancake.
  14. Panposition
    Please be SENSIBLE with this! Don’t put your pan in an unbalanced or dangerous position, make sure handles are away from the edge at all times.
  15. Now it’s time to look for BUBBLES
  16. bubbles-fish-o
    Couldn’t resist!

    Serious talk though, bubbles are very important at this stage. You want the whole pancake to have popped bubbles all over before you flip it over. That’s how you’ll know it’s the perfect amount done on the other side.

    Check out the picture below, the top one is not quite done, there’s a patch in the bottom left that’s still quite wet with bubbles still below the surface of the batter.

    The bottom picture shows the perfect amount of bubbles evenly distributed across the pancake
    Lookingforbubbles

  17. Once you see perfect bubbles all over, flip it over with your big spatula, it should look like below:
  18. perfect

  19. Give it at least thirty seconds on the other side before you check it. Keep checking until it’s lightly done on the other side.
  20. Repeat steps 6-10 until you run out of batter. You should be able to make at least 8 large pancakes
  21. Add your topping of choice, we went for plain ole Maple Syrup but experiment with different kinds of fruit and definitely try bacon and maple syrup if you haven’t had it before!

final

Serve with a big icy Coca Cola and pretend you’re on Venice Beach already!

coke

Let me know how you get on with these foolproof instructions! I’m super proud of myself because I can usually barely make any food from scratch!

Best DIY gifts for Teenagers

Teenagers… they can be a nightmare to buy for let alone make things for! My advice is to not DIY gifts for teens you don’t know that well!

  1. DIY Gold Leaf Jewellery Tray
Jewelry Tray Display

Credit: Homey Oh My

I mean, I would love this now just as much as I would if I were 16!

2. DIY Galaxy Print T-Shirt

Galaxyshirts

Credit: byhandlondon

Fun and cute. Their friends will ask where they got it, you will be cool forever.

3. A Starbucks Cup gift

Credit: somuchtodew

Obviously include a Starbucks gift card but you can tailor this to your teen. Add little Lego toys for boys, think small beauty items like nail varnish for girls.

4. Chalkboard Coasters

Credit: westermanfam

These are a great present for slightly older teens (think 17+) who are about to head off into the wilderness of real life. Everyone needs coasters!

5. DIY Passport Holder

Credit: AlwaysRooney

Feed their wanderlust with a custom passport holder!

6. Soda pop candy bottles

Credit: kmckaydesigns

Technically a father’s day gift but I know a lot of teenage boys who would love this!

7. Lip Balm Locket

Credit: beautylish

Just love everything about this, I am forever without lip balm, anyone want to make this for me?

8. Lounge Pants

Picture of How to Sew Your Own Pajama Pants

Credit: compwalla

Make these in an appropriate fabric, the more aligned with their interests the better! Think Comic Books, Superheroes, Video games, Disney etc. Find out what they like!

9. Heat-resistant Hair Straightener Cozy

Credit: gatheringtwigs

This is a brilliant DIY and parents will thank you for not allowing their house to burn down!

10. DIY giant chevron floor pillows

pin

Credit: OverLovin’

Teenagers will LOVE these floor pillows, brilliant for lounging about with their friends. Try and match the fabrics to their room decor if possible!

Pin this for the future:

TeenOval

Ariel “Kiss the Girl” Skirt & Hair Bow

My housemate’s Halloween costume this year was Ariel from the Little Mermaid when she goes on her date with Eric:kiss

She already had a white top and corset but asked if I could make the long blue skirt for her. Of course I said yes and then procrastinated about doing it until the weekend before it was needed!

Luckily, I’d been proactive about getting the fabric and zip! I ordered a couple of swatches from myfabrics.com and decided that their Cotton Twill Stretch in Turquoise was the best option:

81_2887_104

I ordered 2 metres of it and a 22″ blue invisible zip.

I measured Lucy’s waist and used it to calculate the measurements for a half circle skirt using this calculator by Patty over at The SnugBug Collective. I subtracted 4 inches for bias stretch as it is a stretchy material.

I took my half circle skirt measurements and drew my pattern on pattern paper and worked out that I would need to have three panels to fit the pieces onto the fabric while keeping the length that I needed. I made the front of the skirt from one panel (i.e. half of the skirt) and then split the other half into two pieces. I didn’t have enough pattern paper to create the full length so I had to wing it while I was marking out the fabric:

PatternArielKissTheGirlCostumeTutorialCosplay

What I also realised quite quickly was that my fabric wouldn’t be wide enough to use the angles you see in the photo above so I adjusted my pattern pieces to bring the skirt in a little on each side while keeping the waist measurement the same.

Once I’d cut out my pieces, I sewed the front piece to the two back pieces and attached a waistband:

SkirtArielKissTheGirlCostumeTutorialCosplay

I then attempted my first invisible zip for the back seam! It wasn’t as invisible as I might like but since it would mostly be hidden by the corset, I wasn’t too fussed. I have decided to invest in an invisible zipper foot for my sewing machine though!

I finished the back seam and then left the skirt to hang for 48 hours in case the fabric dropped. I’ve heard that can happen with circle skirts if you hem them straight away.

I then hemmed the skirt and was pretty happy with the finished piece:

FinishedSkirtArielKissTheGirlCostumeTutorialCosplay

I then made a bow for Lucy’s hair using this tutorial from the scrap skirt fabric (I used felt instead of interfacing as that’s what I had to hand at the time):

HairBowArielKissTheGirlCostumeTutorialCosplay

Lucy gave the skirt a good press before she wore it for Halloween at the office and the final costume was awesome:

FinishedcostumeArielKissTheGirlCostumeTutorialCosplay

Glitter Tipped Nails

Nails

To go with my Halloween outfit, I decided to crack the glitter out and create glitter tipped nails. To do this, I used Rimmel Metal Rush and Rimmel Precious Stones polishes:

MetalRush

Rimmel Metal Rush – Pearly Queen

Preciousstones

Rimmel Precious Stones – Diamond Dust

I started with a clear base coat, then did two coats of the Metal Rush polish. This is a great nail polish in it’s own right, people always comment on it when I wear it as it’s quite unusual. In fact, my boss asked me about it at the end of my job interview!

I then used the Precious Stones polish and started at the tip of my nail, dabbing it along the edge and then gently sweeping it down towards the nail bed. The idea is for the glitter to get lighter towards the bottom of your nail.

Once all of that’s dry, a final clear coat will help it all stay on a bit longer!

I did this for my fairy costume but I think it’ll look great for Christmas parties as well.

Fairy Tulle Skirt Tutorial

HalloweenTulleSkirtACLBHalloween this year was mostly celebrated in the office for me. We had a costume competition and there were trophies at stake!

I went as a fairy since I already had some wings that I bought years ago. What I needed was a fairy tulle skirt so I decided to make my own. There are plenty of tutorials out there on Pinterest for this and I skimmed them to get a basic idea of what I needed to do before I started.

I bought 3 metres of tulle, 1 metre of black, 1 metre of purple and 1 metre of red from Ebay (which cost me less than £5) I already had some elastic but I wish I’d used black elastic rather than white so consider this if you’re using dark coloured tulle.

I was pleased with my final result!

If you’d like to make this skirt you will need:

  • Needle and thread (or a sewing machine)
  • Elastic (black would look better)
  • 1 metre of tulle in each colour you want to use (up to 3 metres) – I used Purple, Red and Black

N.b.If you are a size 8-12 you will probably only need 2 metres so divide your colours accordingly), I’m a size 16 and used 3 metres to make the skirt with a couple of inches left over from each colour.

First measure your elastic to your waist size minus a couple of inches. Sew your elastic together using a needle and thread or a sewing machine. A sewing machine it better since you can use a zigzag stitch to avoid it just snapping. If you are using a needle and thread try to imitate a zig zag stitch as shown below:

zigzag stitch

Fold your tulle in half and cut into 4 inch strips. Repeat for all colours.

Place your elastic on something easy to work from, I used the ironing board:

HalloweenElastic

Attach your tulle to your elastic by using the fold you already created to cut the tulle to create a loop, tuck this loop behind the elastic, bring it over the elastic and pull the remaining tulle through the loop:

HalloweenLoopsKeep doing this until you run out of tulle or the elastic is full. I started with red tulle and then added in purple and black until I had a full skirt:

FinishedSkirt

I paired my skirt with this top from H&M but any lacy top would work:

LaceTopHM

Added my amazing wings:

wings

And painted my face silver and purple:

facepaint

What did you dress as for Halloween?

Prepare your pets for Fireworks Season

Fireworks

When I was a kid I loved Bonfire Night, I loved fireworks and sparklers and checking the bonfire for hedgehogs. Our street always did our own fireworks display in a local horse paddock (sans horses obviously).

Now though Bonfire Night, New Years Eve and lots of other random evenings are spent trying to ignore Apple while she shakes uncontrollably at my feet. This sounds cruel but beyond giving her a safe place to hide and trying to distract her, I don’t have a lot of choice. Cuddling her or reassuring her in a human way would reinforce the idea that there’s something to be afraid of and I hope that with lots of work, she will one day learn that there’s no reason to be scared.

To help your dog or other furry friend cope with Fireworks season wherever you may be in the world, follow these straight-forward tips:

DO:

  • Give your pet somewhere safe and quiet that they can retreat to if they are scared. This could be a crate or a den that you create in the living room if your pet’s crate is usually kept somewhere else.
  • Avoid walking dogs after dark. Some people start setting off fireworks at 5:30 pm when the light has barely disappeared from the sky! Aim for no later than 3 pm in the UK if you can.
  • Close all windows and curtains.
  • Ensure your pet is microchipped in case they escape in their panic.
  • Put the TV on or play music to cover the noise of the fireworks as best you can.
  • Ignore the fireworks yourself, this will encourage your pet to think that there is no reason to be scared.
  • Seek help from a behaviour therapist if your pet appears to have a serious phobia of fireworks.

DON’T:

  • Let dogs out into the garden after dark without a lead. This is not the time to discover that your garden isn’t escape proof.
  • Force your pet to come out of the hiding place, if they feel safe and they aren’t in any danger, leave them be.
  • Try to “de-sensitise” your dog to fireworks by exposing them to a display. Any attempts at behaviour modification should only be done under the supervision of a trained professional.
  • Take your pet to a fireworks display, even if they seem fine, they are most likely not enjoying it. Leave them safely at home.

Best DIY gifts for Best Friends

Continuing my posts on DIY gifts for different people in your life, I’ve compiled my favourite gifts for best friends. Besties can be hard to buy for, especially if you don’t see them as often as you’d like to!

1. Teacup Lights

Teacup Lights

This is a super cute DIY, that’s gentle on the purse but looks awesome when given to someone.

2. Mini Book Necklace

I love this DIY, I’ve made two of these for my besties in the past and will likely make another for myself soon!

3. Scrabble Coasters

I love all things scrabble themed and these would make a gorgeous gift.

4. DIY Gold Flutes

DIY Painted Glass

I love how elegant these glasses are and how easy they are to do!

5. Homemade coffee syrups

Coffee-Syrups-ChaosServedDa

Perfect for your caffeine addicted bestie!

6. Cute make-up bag

IMG_6560

I for one am always in need of a new makeup bag and this DIY is super easy. Pick fabric to suit their personality and go to town!

7. Earlier this year I posted my monogrammed mugs DIY made for a couple of my besties:

Finished Mugs

I really enjoyed making these mugs and I’m tempted to make some more this year!

8. DIY Mini Spa Kit

For your stressed out bestie, pair with slippers and a hot water bottle so they can pamper themselves and relax.

9. 30 Minute Infinity Scarf (You don’t even need knitting needles!)

30-minute-infinity-scarf-gaba

Ok, I’m going to have to make this even if I don’t give it to anyone else, it looks so snuggly and so easy to make.

10. Emergency Chocolate

Emergency Chocolate Craft on 30 Minute Crafts

When in doubt, chocolate is the answer and this is an awesome way to give it!

These are my top 10, let me know in the comments which are your faves…

Pin this for later:

BFFOval

10 Best DIY Gifts for “Geeks”

Continuing the Christmas DIY gift lists, these are my 10 best DIY gifts for so called “geeks”. Really this is just a chance for my fave Fandom based DIYs to shine!

1. Bow Tie Tuxedo frame:

Credit: Plaid

So this tutorial isn’t actually Dr Who themed but it was where my brain went immediately when I saw it. I would theme it with a white checked shirt and add braces to make it even more Dr Who themed. Add a photo of you and your geeky friend for the perfect, personal gift!

2. Batman Lamp:

Picture of Batman lamp

Credit: fabrika.carolija

This looks awesome and the perfect gift for the Batman fanatic in your life!

3. Harry Potter Wand:

Tutorial to make these diy wands for your Harry Potter party

Credit: Boxy Colonial

This tutorial is aimed at making multiple wands for a Harry Potter party but there’s nothing to stop you making one for your geeky loved one!

4. Darth Vader Shoes:

Darth Vader Shoes Tutorial

Credit: Twin Dragon Fly Designs

I love geeky shoes. They’re practical, subtle (ish) and still show your geeky side.

5. TARDIS Christmas Tree Ornament:

Picture of DIY TARDIS Ornament

Credit: craftycounterpart

The perfect addition to any Whovian’s Christmas Tree.

6. Comic Book Heels:

Credit: ironspleen

I don’t even think this needs explanation… amazing.

7. Harry Potter Potions Kit

Harry Potter potions kit

Credit: Stitch/Craft

This is amazing, I want this, who wouldn’t want this? The potions actually do things (spoilers, it’s basically a science experiment wrapped up as Harry Potter which I LOVE.)

8. Pixel Trash Can:

Picture of Pixel Trash Can

Credit: BrittLiv

Practical and geeky. Wins every time!

9. Pikachu Hoodie:

Pikachu-Hoodie-Instagram

Credit: kawaiikakkoiisugoi

Gotta catch ’em all! Perfect DIY for the Pokémon fan in your life!

10. Hunger Games Tote Bag:

Credit: showmecute

May the odds be ever in your favour when you make this awesome tote bag!

Pin this for future reference:

geekoval